
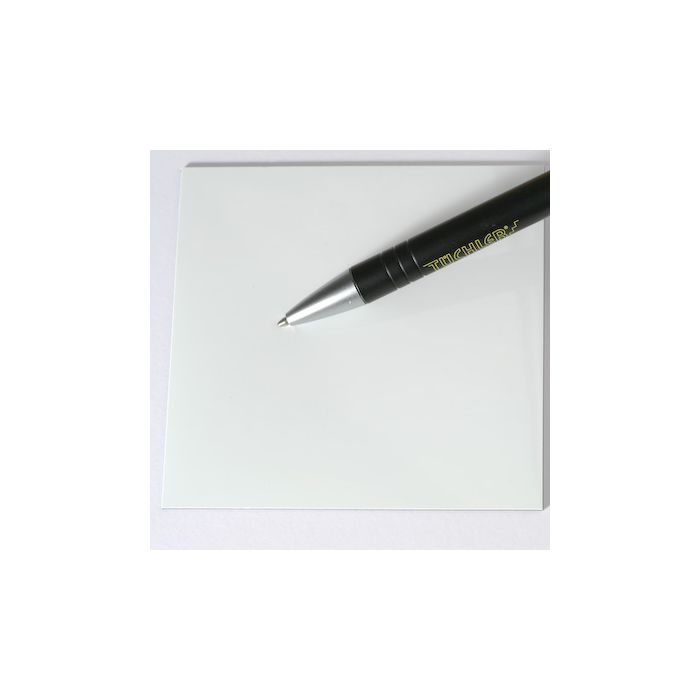
SHOWFLOOR MOONSHINE GLOSS
 Made in EU
Custom colours: only 15% surcharge plus a one-off fee of 280 euros for colour laboratory costs.
Jetzt anmelden/registrieren und Downloads freischalten
No downloads are available for this sales item.
Technische Details:
- flame-retardant;EN 13501-1, Bfl-s1
- KM2 (123-FZ RF)
- 100% vinyl
- width 150 cm
- 1600 g/m²
- thicknesse 1,2mm
- ballet: average
- protective flooring: good
- Event & exhibition flooring: good
- flamenco, step, irish: good
- modern, jazz dance, hip-hop: average
- Show & effect flooring: good
- stage flooring: average
- walz, foxtrot & co: not recommended
- contemporary: average
% REMAINING STOCK % SALE %
Please note: Remaining stock items are reserved in the shopping cart for 24 hours.
| ArtNr | Name | Color/Size/Deco | Quantity | Price Offer | Charge | Quality | Note | |
|---|---|---|---|---|---|---|---|---|
| 1004907 | SHOWFLOOR MOONSHINE GLOSS | MS123 RUBYRED 150CM / LFM | 6,85 lm | Z5/21/41/24 | 1st choice |
Please note that remaining stock may be slightly shorter or longer than indicated. Smaller quantities of up to 10% of the target length are deemed to be compensated by the remaining stock discount. If there are major deviations in individual cases, you can return the uncut piece to and receive a refund of the purchase price. As with normal pieces, cut pieces are excluded from exchange or return. Please note that remaining stock is excluded from return for reasons other than the above-mentioned quantity deviation or justified quality defects.
APPLICATION & WARNING INSTRUCTIONS FOR DANCE & FLOOR COVERINGS!
valid from September 1, 2024
1. Purpose and Quality Assessment
TÜCHLER dance and floor coverings are designed for use in the event industry, on stages, in theatres, operas, events, and similar applications. Please observe the indicated ratings and usage instructions! Quality assessments are therefore only possible in relation to the product-specific stated function. TÜCHLER dance and floor coverings are not designed for home or project use. Any assessment according to standards applicable to flooring or carpets, particularly DIN standards, and complaints based on them, are excluded unless otherwise agreed in writing in a contract.
2. Important Notice on Shoe and Sneaker Abrasion Marks
Since around 2023, shoes, particularly sports shoes (sneakers) with sole material, have appeared on the market that can leave significant abrasion marks on dance floors. These marks are caused by the rubbing of the sole material, which creates an extremely strong bond with the floor surface and is difficult to remove, even with the use of strong solvents and cleaning machinery. Light soles on dark floors and vice versa are particularly affected. Please note that such abrasion marks do not indicate a defect in the floor, but are caused by inappropriate footwear. Therefore, test the compatibility of shoes, especially sports shoes (sneakers) with elastic soles, with the dance floor before use.
3. Risk of Slippery or Slick Spots
Slippery spots on dance floors pose a risk of accidents. These are primarily caused by:
3.1. the interaction of skin oils and sweat, as well as polishing through dancing
3.2. the use of gloss cleaners and waxes
3.3. polishing during floor cleaning
Check your floors for slippery or slick spots before use and eliminate them with proper cleaning. If the required friction values of the dance floor are no longer achieved after several years of use, then the floor has reached the end of its technical lifecycle and must be replaced.
4. Cleaning
Therefore, clean your floor regularly and only with appropriate products, such as TÜCHLER cleaners, ANTISTAT, and BISON.
Never use gloss or polishing agents!
5. Storage of Dance and Floor Coverings
Recommended storage methods:
5.1. Store your floor covering rolled up, standing upright, or rolled on pipes, ideally on TÜCHLER dance floor transport trolleys.
5.2. When storing rolls horizontally in a stack, use load-distributing layers such as Styrofoam strips.
5.3. Never stack more than 4 layers (i.e., a maximum of 3 layers on the bottom one; for ConfiDance and Consor 20m rolls, 3 layers, i.e., a maximum of 2 layers on the bottom one) on top of each other, as the cores may deform and cause deep pressure marks.
5.4. If you receive floor coverings packaged in boxes, never stack more than 3 boxes on top of each other, i.e., a maximum of 2 boxes on the bottom one.
Dance floors may show pressure lines running across the length when stored correctly in horizontal layers, which do not affect their usability for dancing and therefore do not reduce their value.
6. Temperature Conditions
Dance and stage floors are made of thermoplastic PVC. Before rolling out, ensure the core temperature of the rolls is not below 21°C. Using the floor at a lower core temperature can cause stiffness and waves. There is a risk of breakage at arctic temperatures. Direct sunlight can cause permanent damage and significantly increased friction values.
7. Installation Methods
7.1. Portable (mobile) installation
The portable installation method is typical for stages, theatres, operas, but also for temporary event, performance, and rehearsal spaces, where this temporary use can often last for years. The floor strips are loosely rolled out, edge to edge, and taped together on the surface with tape. Please note that this installation method does not comply with general flooring installation standards. Complaints based on relevant flooring standards are therefore excluded. Note that the tape wears out and must be replaced regularly, the floor may shift, water may seep under the floor during wet cleaning if the tape is damaged, and waves may form. Using floor cleaning machines can lead to accidents and damage to the floor.
7.2. Semipermanent installation
The semipermanent installation method is typical for temporary event, performance, and rehearsal spaces where no tape is visible on the surface. This temporary use can also often last for years. The floor strips are loosely rolled out, edge to edge, and taped underneath with double-sided tape. Please note that this installation method does not comply with general flooring installation standards. Complaints based on relevant flooring standards are therefore excluded. Note that the tape may leave marks on the subfloor, the floor covering may form waves that need to be fixed by lifting and retaping, and water may seep under the floor during cleaning. Using floor cleaning machines can lead to accidents and damage to the floor.
7.3. Permanent installation
The permanent installation method must be carried out by professionals in accordance with general flooring installation standards. Please check if your floor covering is suitable for this installation method as noted above.
8. Subfloor Requirements
The subfloor must be dry, perfectly smooth, and free of cracks, non-adhering materials, loose layers, anti-adhesive chemicals, and dust. For concrete subfloors, the moisture content must not exceed 2.5%, and for screed, it must not exceed 0.5%. Check the relevant floor data before installation. A primer may be required for pre-treatment.
9. Gluing
Roll out the dance floor on site and allow it to acclimate for 24 hours at a minimum of 21°C. After the floor has relaxed, trim it with +5cm excess length on each side. Fold back the floor strips halfway and apply adhesive to the subfloor with a notched trowel. Press the strips into the adhesive bed from the center, free of air bubbles, and press firmly. We recommend Thomsit K 188E adhesive from Henkel. Please also observe the adhesive manufacturer's instructions! Note that dance floors are thin and unpatterned, so even the slightest irregularities on the surface will be visible, especially under raking, counter, or side lighting. This does not affect usability for dancing and does not reduce the value.
10. Welding
10.1. Hot air welding
After the adhesive has dried (please observe the drying times of your adhesive), open the seams with a suitable milling machine and clean them of any adhesive residues. We recommend using only TÜCHLER® welding rods designed for the Consor dance floor. Set the hot air to a minimum of 300°C. Before final welding, test and adjust your machine settings for temperature and speed. After the weld seam has cooled, remove the excess welding rod in two steps. First, remove about half of the rod with a suitable knife or planer. Only after the weld has completely cooled, shave off the remaining rod flush with the floor surface. Note that the colors of the welding rods may not exactly match the colors of the floors.
10.2. Cold welding
All suitable commercially available chemicals can be used. Preliminary tests must be conducted, and the cold welding agents must be used according to the manufacturer's instructions.